STOP AUDIT FAILURE: The 5 Critical Mistakes Your Team Makes in Pressure Calibration email us today info@addit-metrology.com
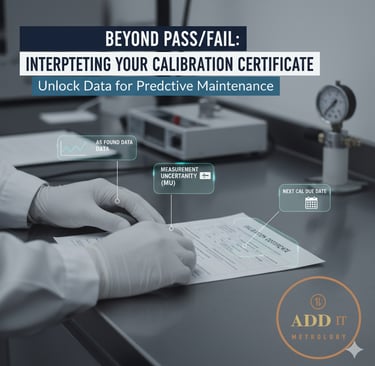
Beyond the "Pass/Fail": How to Truly Interpret Your Calibration Certificate
How to truly interpret your calibration certificate
Bradley Hemple
11/5/20253 min read
You've got your calibration certificate in hand. It's signed, stamped, and ready for your records. But are you truly understanding what it's telling you? A calibration certificate is a treasure trove of information, providing critical insights into your instrument's performance and the validity of your measurements.
Let's break down the essential sections and what they mean for you:
1. Basic Identification Information
Instrument Under Test (IUT) Details: This section confirms what was calibrated. Check the manufacturer, model number, serial number, and any internal asset ID. Why it matters: Ensures the certificate belongs to the correct instrument and prevents mix-ups.
Customer Information: Your company's name and address. Why it matters: For record-keeping and audit trails.
Calibration Lab Information: The name, address, and accreditation body (e.g., ISO/IEC 17025 accreditation symbol). Why it matters: Confirms the lab's competence and the traceability of their measurements. Always look for accredited labs!
2. Calibration Conditions & Standards Used
Environmental Conditions: Temperature, humidity, and sometimes barometric pressure during calibration. Why it matters: Extreme environmental conditions can affect instrument performance, so this ensures the calibration was performed under stable and appropriate conditions.
Reference Standards Used: Details of the calibration standards used (e.g., Fluke 750 calibrator, deadweight tester model XYZ) and their serial numbers, along with their own calibration due dates. Why it matters: This is crucial for traceability. It shows that your instrument's accuracy is linked back to national or international primary standards through an unbroken chain of comparisons.
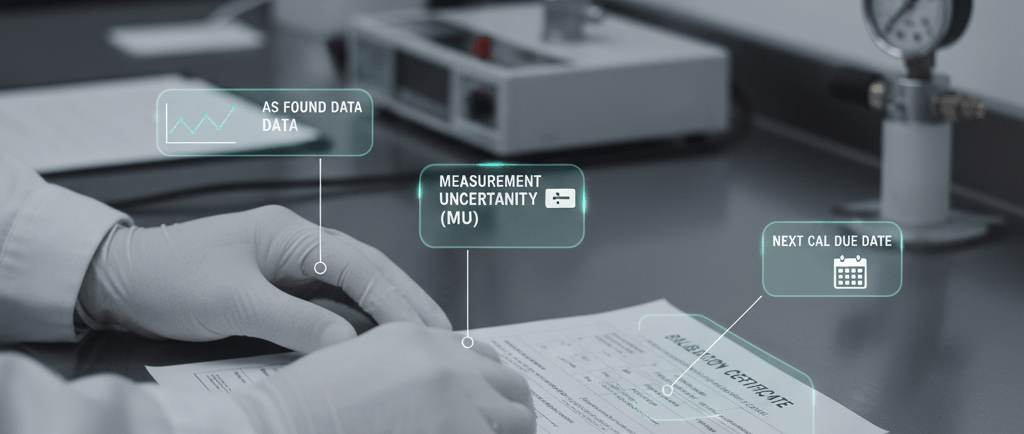
3. The Core: "As Found" and "As Left" Data
This is where the real interpretive work begins!
"As Found" Data: These are the readings taken before any adjustments were made to your instrument.
What to Look For: Compare these readings to your instrument's specified tolerance or your process-specific tolerance.
Interpretation:
Within Tolerance: Great! The instrument was performing correctly.
Outside Tolerance: A critical finding! This means your instrument was providing incorrect measurements for some period before calibration. This might trigger a review of product quality, safety implications, or a recall/quarantine of products manufactured during that period.
Drift Analysis: Even if "As Found" is within tolerance, significant drift from the last calibration's "As Left" reading indicates potential instability. Tracking this over time allows for predictive maintenance and optimized calibration intervals.
"As Left" Data: These are the readings taken after any adjustments were made to your instrument.
What to Look For: These readings should always be within the specified tolerance.
Interpretation:
Within Tolerance: Confirms the instrument is now accurate and ready for use.
Outside Tolerance (Rare): If it's still outside tolerance after adjustment, the instrument may be faulty or require repair.
Adjustment Made: Note whether an adjustment was performed. Repeated adjustments on an instrument suggest an underlying issue (e.g., wear, environmental stress).
4. Measurement Uncertainty (MU)
What it is: Every measurement has some degree of uncertainty. The MU value quantifies the doubt associated with the calibration result. It's typically presented as a range (e.g., ± 0.01% of reading).
Why it matters:
Process Compatibility: Your process may have a very tight tolerance. If the instrument's MU is too large relative to that tolerance, the instrument might not be suitable for the application, even if it "passes" calibration.
Risk Assessment: MU helps you understand the risk of making an incorrect decision based on an instrument's reading. A higher MU means a higher risk.
Test Uncertainty Ratio (TUR): Many quality systems require a specific TUR (e.g., 4:1 or 10:1), which compares the tolerance of the IUT to the MU of the calibration.
5. Calibration Interval / Next Due Date
What it is: The recommended date for the next calibration.
Why it matters: This is usually based on the manufacturer's recommendations, industry standards, or your own internal data analysis (drift, criticality, usage). It's your responsibility to ensure instruments are recalibrated before this date.
6. Signature, Date & Accreditation Symbol
Signature of Calibrator/Reviewer and Date: Authenticates the certificate.
Accreditation Symbol: A crucial stamp from a recognized accreditation body (e.g., A2LA, UKAS, DAkkS). Why it matters: This confirms the calibration lab has been rigorously assessed for its technical competence and adherence to international standards like ISO/IEC 17025. It provides confidence in the reliability and traceability of the results.
Actionable Takeaways from Your Certificate
After interpreting these sections, ask yourself:
Was the instrument accurate for its entire cycle (prior to "As Found" data)? If not, what are the implications?
Is the instrument suitable for its intended application, considering its "As Left" accuracy and Measurement Uncertainty?
Are there any trends (e.g., consistent drift, frequent adjustments) that indicate an instrument or process issue?
Are our calibration intervals appropriate, or should they be adjusted based on historical performance?
By moving beyond a simple glance and truly interpreting your calibration certificates, you transform them from a compliance burden into a powerful tool for quality, efficiency, and continuous improvement in your operations.
Training
Ready to enhance your team's pressure metrology expertise?
Contact our training specialists today to discuss your specific requirements, inquire about course schedules, or request a detailed proposal for customised training.
Consultation
info@addit-metrology.com
+44 7498 956 496
© 2025. All rights reserved.